Home cleaning, organization and lifestyle tips
The washing machine filter is tiny, but it’s one of the most important parts. Coins, buttons, bobby pins, hair, lint — they all end up there. If you ignore it, you’ll get smells, poor draining, and eventually a burned-out pump. I learned this the hard way when my washer stopped draining and the repair guy asked, “When was the last time you cleaned the filter?” I felt pretty ashamed.
The good news? Cleaning it takes five minutes. The bad news? If you’ve never done it, there might be a surprise waiting inside.
Why regular filter cleaning matters
| Problem | What happens |
|---|---|
| Clogged filter | Water won’t drain, and the spin cycle may fail |
| Bad odors | Trapped organic gunk rots and starts to smell |
| Pump strain | The pump works harder and can burn out faster |
| Foreign objects | Coins, pins, or wires can damage the drum or heating element |
What you’ll need
- A shallow bowl or container
- An old towel for spills
- Gloves, optional but recommended
- A toothpick or small brush to clean holes and stubborn debris
Step-by-step guide
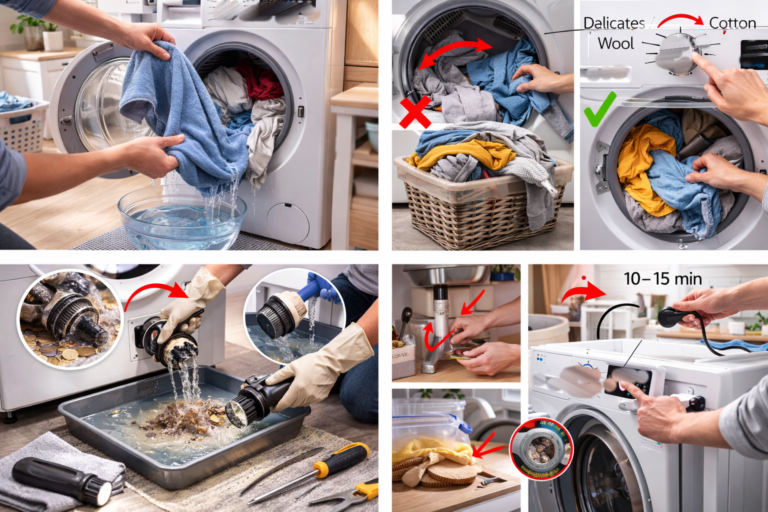
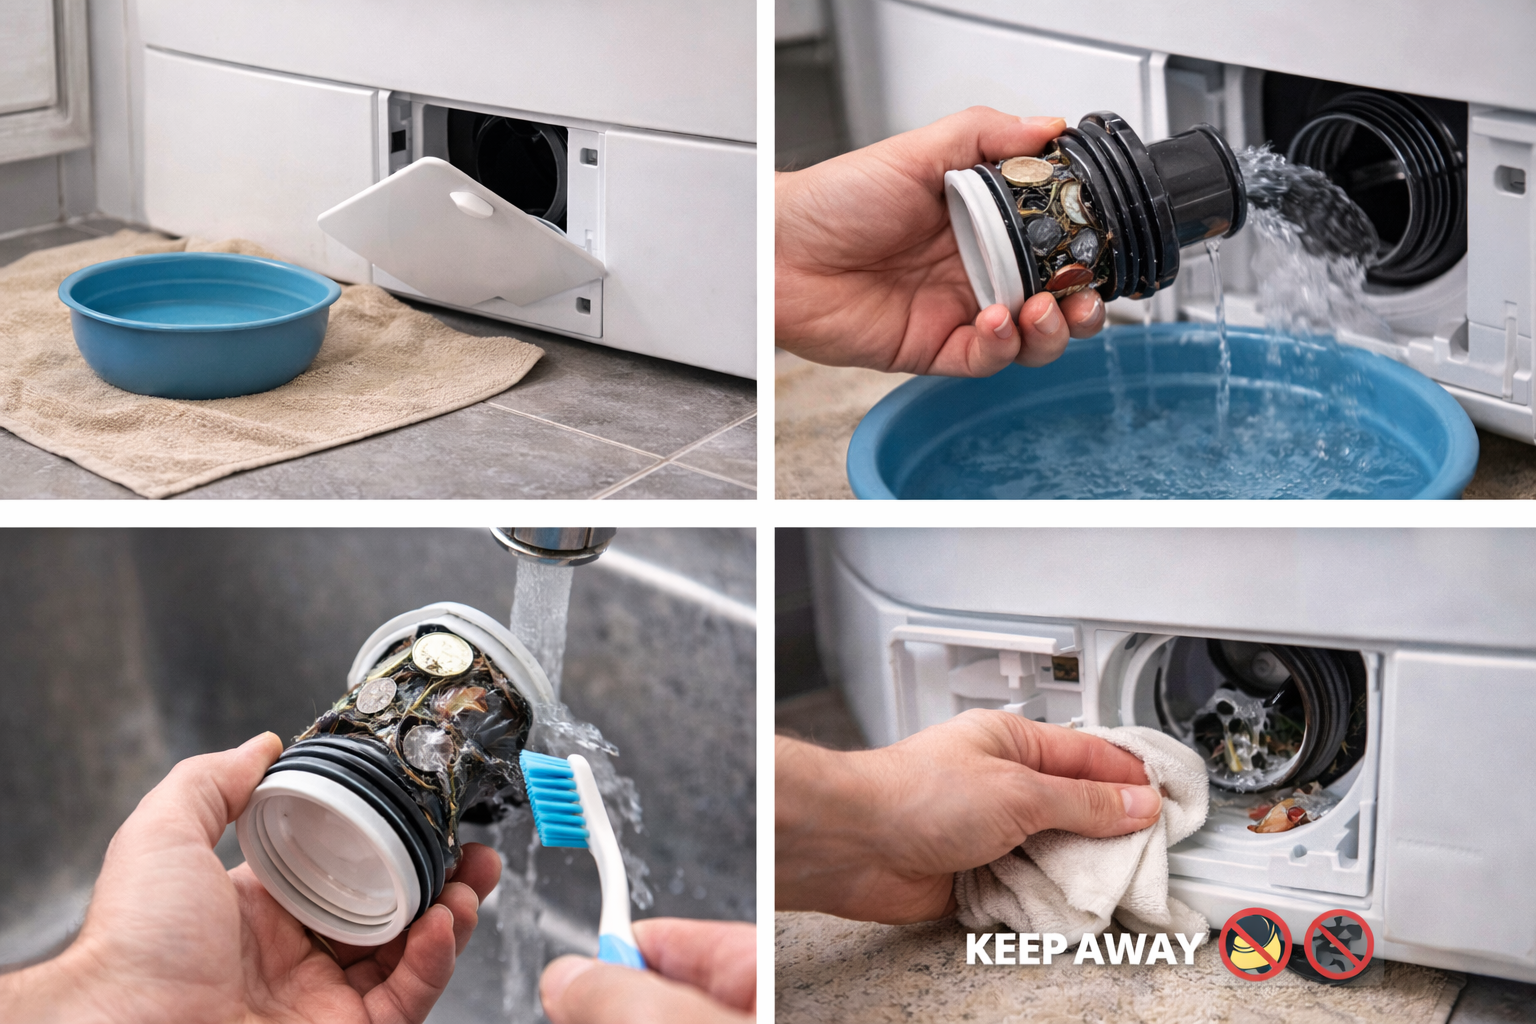
Step 1. Find the filter
The filter is almost always at the bottom front of the machine, behind a small access panel on the right or left side. On some models, the panel may be solid and need a screwdriver to open.
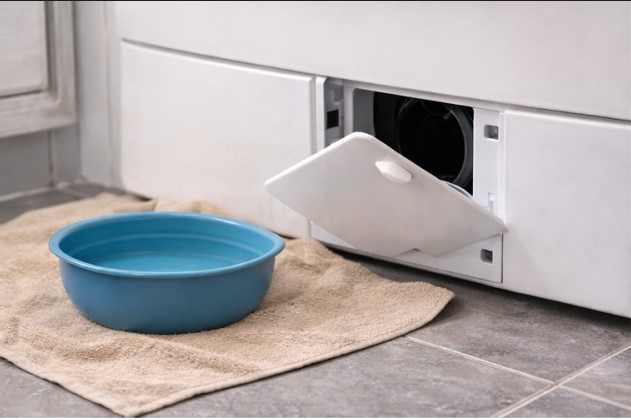
Step 2. Prepare for water
Even after you drain the machine, there will usually be water left in the filter area. Lay down a towel and place your bowl underneath before opening anything.
Step 3. Open the cover and unscrew the filter
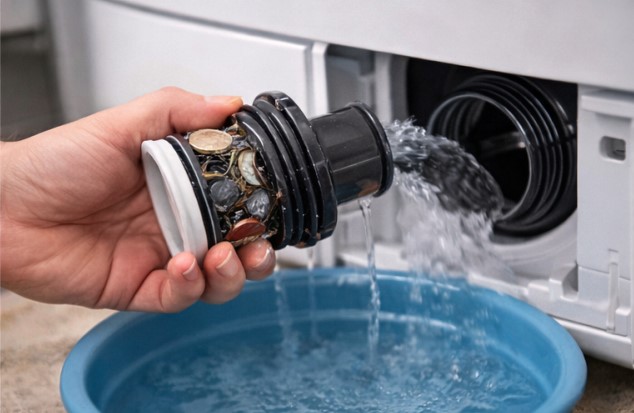
- Turn the filter counterclockwise.
- If it will not move, do not force it. There may be a hidden screw or latch.
- Water will start draining. Let it flow into the bowl.
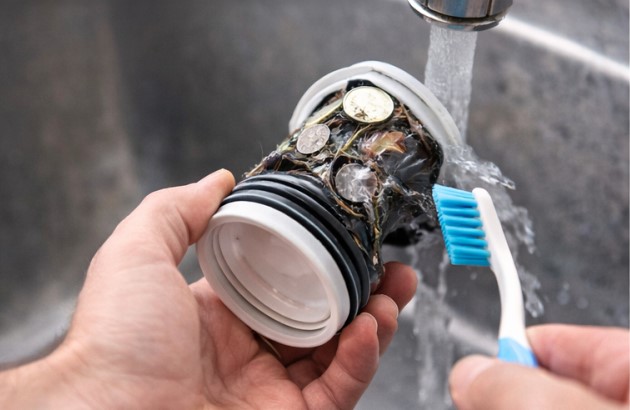
Step 4. Remove and clean the filter
Pull out all debris: coins, hair, lint, and any mysterious gunk. Rinse the filter under hot water. If dirt is stuck in the small holes, use an old toothbrush, toothpick, or small brush.
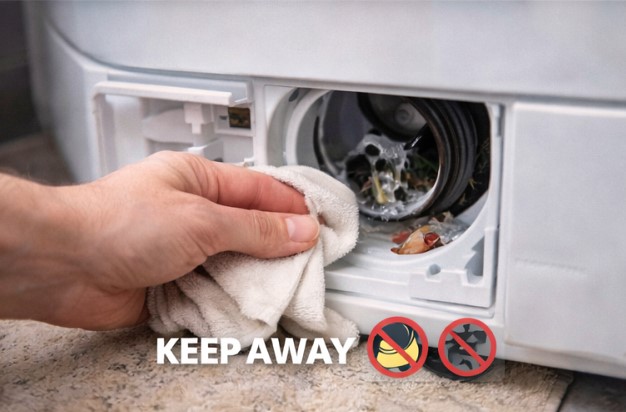
Step 5. Clean the filter housing
Look inside the opening where the filter sits. There is probably more junk in there. Wipe it out with a cloth or paper towel and remove anything you can reach.
Step 6. Reinstall the filter
Screw the filter back in clockwise. Hand-tight is enough, so do not overdo it. Then close the access panel.
Step 7. Test it
Run a quick empty rinse cycle and check that water drains normally. Also look around the filter panel to make sure there are no leaks.
How often should you clean it?
| Usage | How often to clean |
|---|---|
| 1-2 people, about 2 loads a week | Every 2-3 months |
| Family with kids, daily washes | Once a month |
| Pets in the house | Every 2-3 weeks |
| You notice a smell or slow draining | Immediately — don’t wait |
Prevention tips
- Check pockets before every load. Coins and tissues are the main cloggers.
- Use mesh laundry bags for small items like socks and bras.
- Avoid washing items with metal underwires unless they are inside a protective bag.
- Clean the filter regularly even if nothing seems wrong. Prevention is easier than repair.
The bottom line
Cleaning your washer’s filter takes 5-10 minutes, but it can add years to your machine’s life. Do not skip it — your washer will reward you with better performance and no funky smells.
Tested on my own washer: since I started cleaning the filter every month, it has been running like new for seven years.
Have you ever cleaned your filter? What did you find in there? Share your horror stories in the comments!